1. Access the Azure Portal
- Go to the Azure portal.
2. Create a New App Registration
- Navigate to Azure Active Directory > App registrations > New registration.
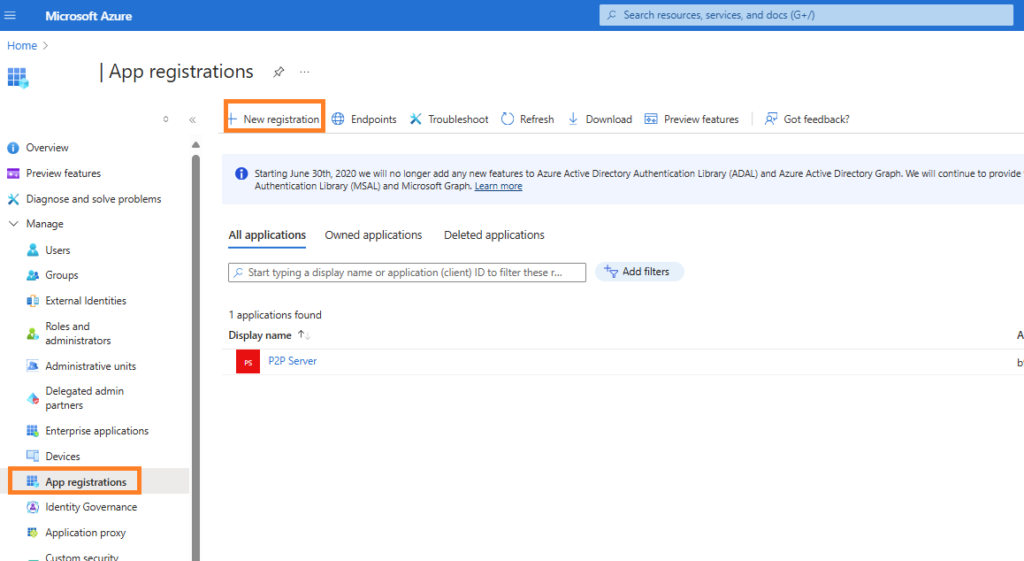
- Provide a name for your application, and under Supported account types, choose the appropriate option (typically, Accounts in this organizational directory only or Accounts in any organizational directory).
- Click on register
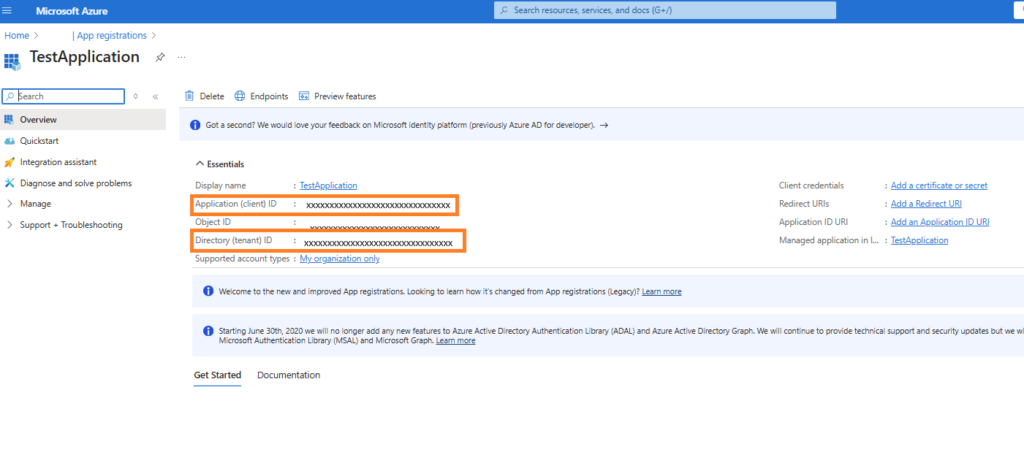
3. Note Application (Client) ID and Directory (Tenant) ID
- After registration, note down the Application (client) ID and Directory (tenant) ID. You’ll need these to authenticate your application.
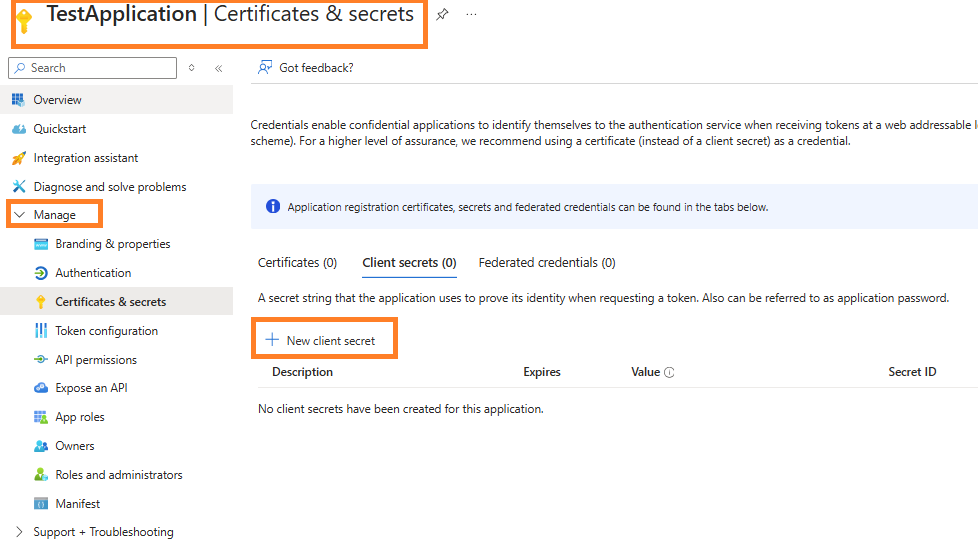
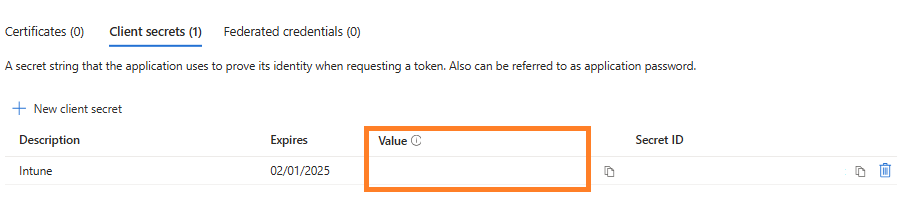
4. Generate Client Secret (Optional)
- In some scenarios, you might need a Client Secret to authenticate your application. You can generate this under Certificates & secrets > New client secret.
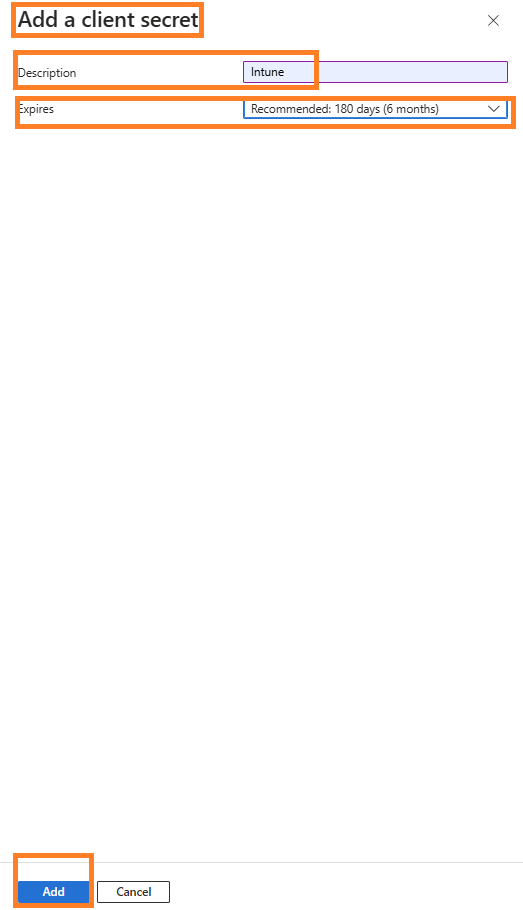
Click on + New client secret and Description and Expire > Click on Finish to ADD.
Grab the Value for your script\Application.
5. Assign API Permissions to Microsoft Graph
- To access Microsoft Graph API, you need to assign appropriate permissions to your application.
- Navigate to API permissions > Add a permission > Microsoft Graph.
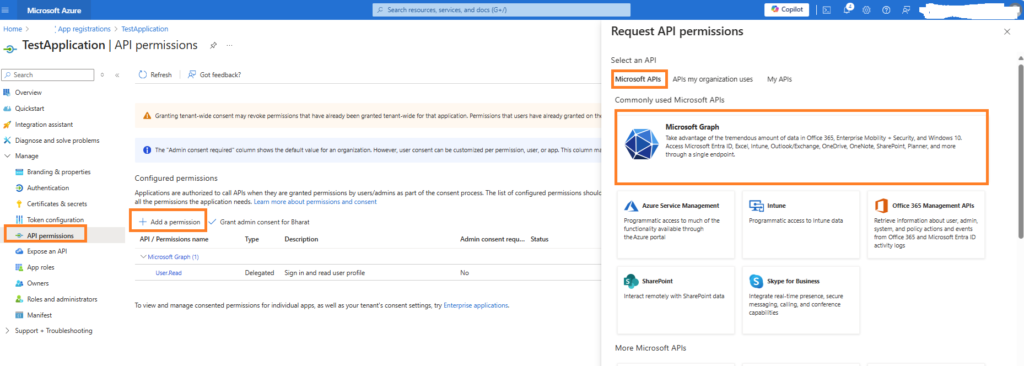

- Select the required permissions your application needs (e.g.,
User.Read,Device.Read.All,Device.ReadWrite.All for access).
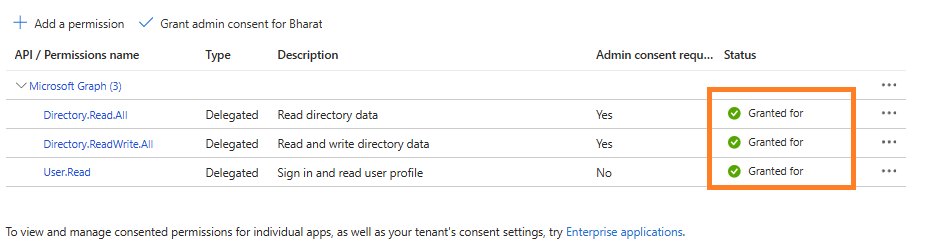
6. Grant Admin Consent (If Needed)
- If your application requires permissions that need admin consent, you’ll need to have an admin grant these permissions.
- Navigate to API permissions > Grant admin consent for [your tenant].
7. Get Access Tokens
- To authenticate and access the Graph API, you’ll use OAuth 2.0 to get an access token.
- Construct a request to
https://login.microsoftonline.com/{tenant_id}/oauth2/v2.0/tokenwith your client_id, client_secret (if applicable), grant_type, and scope (e.g.,https://graph.microsoft.com/.default).
8. Start Using Microsoft Graph API
- With the obtained access token, you can start making requests to the Microsoft Graph API endpoints.